
Speakers are essential to our music, entertainment, and gaming experiences, but they aren’t indestructible. A sudden distortion, buzzing, or complete silence might mean your speaker is blown. While that sounds serious, it doesn’t always mean it’s beyond repair.
In many cases, a blown speaker can be fixed at home with the right tools and a bit of patience. This guide walks you through what a blown speaker actually is, how to diagnose the issue properly, and what steps to take for a safe repair.
Whether you’re working with a home theater unit, car audio system, or studio monitor, these tips are designed for non-experts with a keen interest in DIY fixes. Let’s start with the basics.
What Does It Mean When a Speaker Is Blown?
A “blown” speaker refers to one that no longer reproduces sound correctly, whether that means distorted audio, loss of frequency range, or no sound at all. It can happen suddenly or gradually.
Common causes include overpowering the speaker with high volume, physical damage to internal components, or degradation over time. In many cases, the speaker cone, voice coil, or foam surround may be damaged or disconnected.
There are two types of blown speakers: partially and fully. A partially blown speaker may still emit sound, but with distortion or rattling.
A fully blown speaker usually produces no output at all. Identifying which type you’re dealing with is crucial because the repair methods differ. Sometimes, what sounds like a blown speaker might simply be a loose wire or bad connection.
Understanding the difference is the first step in fixing the issue effectively and possibly saving your gear from a costly replacement.
Tools and Materials You’ll Need
Before beginning any repair, gather these tools and supplies:
- Screwdrivers (Phillips and flathead)
- Multimeter (for continuity and resistance testing)
- Soldering iron and solder
- Replacement parts (foam surround, cone, wire)
- Adhesives (speaker glue or flexible fabric glue)
- Utility knife or tweezers
- Soft cloths or brushes
A clean, well-lit workspace is also essential. Make sure you’re working on a non-static surface, especially when handling internal wiring. Having all the tools within reach will help you work more efficiently and reduce the risk of damaging components further during the repair process.
Step-by-Step: Diagnosing a Blown Speaker
Before attempting any repairs, you must correctly identify the issue. Here’s how to perform a proper diagnosis:
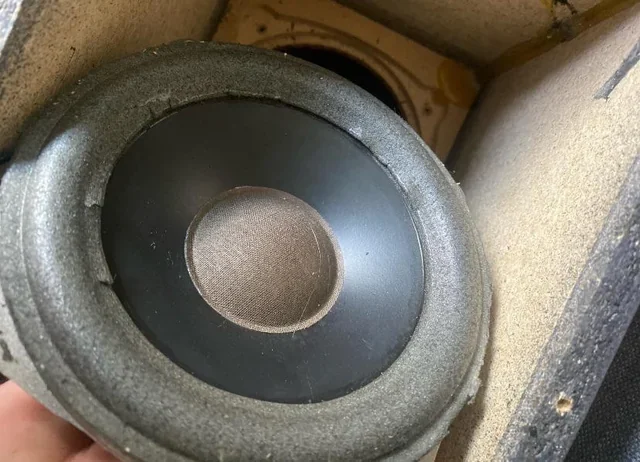
Visual Inspection
- Remove the speaker grill and examine the cone.
- Look for tears, cracks, or misalignment.
- Check if the cone moves freely when lightly pressed.
Sound Test
- Play audio at low and medium volumes.
- Listen for buzzing, crackling, or missing frequencies.
- Try switching the speaker to another channel or device.
Multimeter Test
- Set your multimeter to measure resistance (ohms).
- Disconnect the speaker from power.
- Place the probes on the speaker terminals.
- A healthy speaker will usually read between 4–8 ohms.
- A reading of 0 (short) or infinite (open) indicates damage to the voice coil.
Connection Check
- Inspect wires and terminals for corrosion or looseness.
- Wiggle the cables gently while audio is playing to detect intermittent faults.
Environmental Troubleshooting
- Ensure the distortion isn’t caused by the amp, cables, or audio source.
- Try the speaker on a different system to isolate the issue.
Diagnosing properly ensures you’re fixing the real problem, not just throwing effort at symptoms.
Repairing a Partially Blown Speaker
If your speaker still emits sound (albeit distorted), it may be partially blown. This is often easier to fix and doesn’t always require replacing major parts.
Reattaching or Resoldering Loose Wires
Sometimes, the problem is simply a broken or cold solder joint on the speaker terminal or voice coil leads.
- Use a soldering iron to reflow or reconnect the joint.
- Ensure the contact is solid and clean before powering on.
Fixing a Torn Cone
A torn speaker cone can lead to distortion, but minor tears can be patched.
- Use flexible speaker glue or a mix of white glue and tissue paper.
- Apply the adhesive to the torn area and let it cure completely.
- Avoid using stiff or thick materials that may alter cone movement.

Repairing Surround Foam
Deteriorated or crumbling foam surrounds cause buzzing and poor sound.
- Purchase a foam surround repair kit matched to your speaker size.
- Remove the old foam carefully and clean the surfaces.
- Glue the new foam in place, centering it around the cone.
- Let it cure before testing the speaker again.
Partial damage doesn’t always mean replacement is necessary. With basic tools and patience, many of these repairs are manageable at home. However, always test each repair step with low volume before ramping up to full use.
Repairing a Fully Blown Speaker (Advanced)
Fully blown speakers are more complex to repair and often involve replacing internal components like the voice coil or cone assembly.
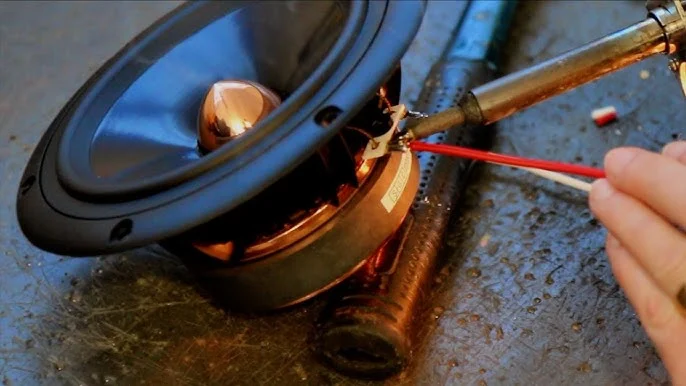
Replacing the Voice Coil
This requires disassembling the speaker completely.
- Remove the dust cap and carefully extract the damaged voice coil.
- Match it with an identical replacement in size and resistance.
- Insert the new coil and align it perfectly to avoid rubbing.
- Resolder the new coil to the terminals and reassemble the speaker.
Replacing the Cone
If the cone is badly damaged:
- Detach the old cone and voice coil assembly.
- Use a replacement kit designed for your speaker model.
- Carefully glue the cone in place and let it dry fully.
- Ensure the voice coil is centered during reassembly.
Advanced repairs require precision. Misalignment, improper materials, or excessive glue can ruin sound quality or the speaker itself. If you’re not confident, consider reaching out to a professional or using this as a learning project for non-essential gear.
When to Replace Instead of Repairing
Not all speakers are worth the time and cost of repair. If the speaker is inexpensive, very old, or the parts are unavailable, replacement may be the smarter route.
Additionally, if both the voice coil and cone are damaged or burnt, the effort and tools required may outweigh the benefit, especially for budget models.
Frequent failures after repair or recurring issues also indicate it’s time to invest in a new unit. In such cases, take your time researching reliable brands and models that offer good durability and support. Sometimes, upgrading is the best fix.
Testing the Speaker After Repair
Once your repairs are complete, it’s essential to test the speaker properly before regular use. Start with a low-volume audio signal to ensure the speaker functions without distortion, crackling, or buzzing.
Gradually increase the volume while monitoring for any anomalies. Use balanced tracks or test tones to evaluate clarity and frequency response.
Avoid testing with bass-heavy music initially, as it may strain components that haven’t fully settled. If everything sounds normal and consistent, you’ve likely succeeded. If issues persist, recheck your repair points or consider further inspection. Consistent testing can ensure your fix holds up in real-world use.
Preventing Future Damage
A repaired speaker deserves better treatment moving forward. Preventing future damage often comes down to how and where you use your audio gear.
- Avoid Overpowering: Always match your speaker’s power rating with the amplifier. Overdriving it can burn the voice coil.
- Keep It Clean: Dust and debris can affect performance over time. Use covers or keep them in clean spaces.
- Limit Moisture Exposure: Speakers and humidity don’t mix well. Avoid placing them near open windows or damp environments.
- Practice Volume Control: Playing music at maximum volume for long periods stresses components and leads to quicker wear.
Routine checks, safe volume levels, and keeping the environment stable will dramatically extend your speaker’s lifespan. Treat it like an investment.
Conclusion
Repairing a blown speaker is both a practical and satisfying task, especially if you’re equipped with the right tools and knowledge. Whether you’re patching a torn cone or replacing a voice coil, the process teaches you more about how your gear works.
While some issues are beyond DIY, many partial faults can be fixed affordably at home. Testing, care, and preventive habits go a long way in avoiding future breakdowns.
Now that you know what it takes, you’re one step closer to better sound without the expense of a full replacement. Your speakers (and your wallet) will thank you.
