

When sound suddenly stops working on your Windows 10 computer, it can be frustrating, especially if you rely on it for meetings, entertainment, or creative work. However, most audio issues are fixable with a few simple steps, even if you’re not tech-savvy.
This guide will elaborate on the most effective ways to fix audio not working in Windows 10. From basic checks to more advanced settings, we’ll cover what you need to do to get your sound back.
Whether you’re using external speakers, headphones, or your built-in laptop speakers, you’ll find solutions tailored to your situation. Let’s start with the most common and often overlooked causes before diving deeper into system settings.
Check the Basics First
Before changing anything in your settings, it’s important to check the obvious but often missed basics.
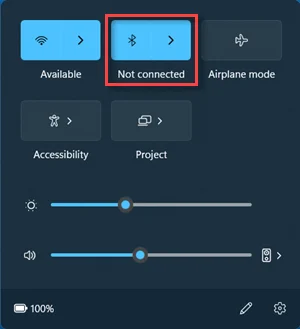
Start by making sure your speakers or headphones are properly connected. If you’re using wired accessories, ensure the cable is fully inserted into the correct port. For Bluetooth devices, confirm they’re paired and connected.
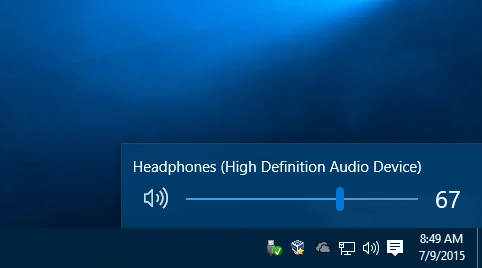
Next, check that your system volume isn’t muted. Click the speaker icon in the system tray and slide the volume up. Some keyboards also have mute buttons. Check those too.
It’s also worth testing whether the audio is playing from the correct device. Right-click the speaker icon, select “Open Sound settings,” and confirm that the correct output device is selected under “Choose your output device.”
Lastly, try unplugging and plugging your audio device back in. You’d be surprised how often that quick action resolves the issue.
Restart Windows Audio Services
Sometimes, the Windows audio service can stop responding or bug out in the background. Restarting it can quickly bring your sound back.
To do this, press Windows + R, type services.msc, and press Enter. It will open the Services window. Scroll down until you find Windows Audio.
Right-click it and select Restart. You should also do the same for Windows Audio Endpoint Builder, which is just below it. These two services control audio processing on your system.
If either service was stuck or had errors, restarting them can reinitialize audio components and resolve problems without changing any other settings.
After restarting the services, close the window and test your sound again. Play a video, open an app with audio, or use the sound test in Windows settings. If audio returns, you’ve found your fix.
Check Playback Device Settings
Windows sometimes gets confused about which device to use for sound. So even if everything seems fine, your system might be sending audio to the wrong place.
To check, right-click the speaker icon in the taskbar and select “Open Sound settings.” Under “Output,” make sure the correct playback device is selected. This might be your laptop’s built-in speakers, a headset, or external speakers.
If you don’t see the right option, scroll down and click “Manage sound devices.”
Here, you can see a list of both active and disabled audio devices. If the one you need is listed as disabled, click it and choose “Enable.”
For more control, click “Sound Control Panel” on the right.
In the “Playback” tab, you’ll see all available output devices. Right-click your preferred one and select “Set as Default Device.”
You can also click “Configure” or “Properties” to test and tweak settings like sample rate or balance.
After confirming the right device is active and selected, try playing the sound again. If you’ve been switching between Bluetooth, HDMI, or USB devices, this is a common step that helps realign your audio path.
Run the Windows Troubleshooter
Before diving into advanced fixes, starting with the built-in Windows audio troubleshooter is always smart. While it may seem basic, it can automatically detect and resolve many common issues, especially those related to configuration or service errors.
To run it:
- Go to Settings > Update & Security > Troubleshoot.
- Click Additional troubleshooters (if available).
- Select Playing Audio, then click Run the troubleshooter.
Windows will scan your system for missing drivers, disabled audio devices, or misconfigured settings. If a problem is found, it will either apply a fix or offer suggestions you can follow.
This simple step has resolved issues that didn’t respond to driver updates or restarts for some users. It can also re-enable disabled services or reset devices you didn’t know were muted.
If the troubleshooter doesn’t work, at least it gives clues, like identifying your output device or flagging unsupported formats.
Even if you’re tech-savvy, this tool is worth running early in the process. It saves time, rules out obvious errors, and is especially helpful when you’re unsure where to start.
Think of it as your first line of defense before going deeper into manual adjustments or resets.
Run the Built-in Troubleshooter
Windows 10 has a built-in troubleshooter that can automatically detect and fix many audio-related issues. It’s different from the general troubleshooter from the last section. It’s a good starting point, especially if you’re unsure what’s wrong.
To run it, go to Settings > System > Sound. Scroll down and click “Troubleshoot” under the “Output” section. Windows will begin scanning for potential problems with your audio devices.
Follow the on-screen instructions. It may prompt you to select the device that isn’t working or apply a recommended fix. The troubleshooter often resets services, checks drivers, and reassigns output devices, all without requiring technical knowledge.
Even if the tool doesn’t fix everything, it can help identify what’s wrong or at least eliminate a few possibilities. After running it, test your sound again to see if things are back to normal.
If the issue persists, proceed to the following steps, which cover more targeted fixes, such as drivers and updates.
Update or Reinstall Audio Drivers
Your audio drivers are responsible for helping Windows communicate with your sound hardware. If they’re outdated, missing, or corrupted, you might experience no sound at all. Here’s how to fix that:
Step 1: Use Device Manager
- Press Windows + X and select Device Manager.
- Expand Sound, video and game controllers.
- Right-click your audio device (e.g., “Realtek High Definition Audio”) and choose Update driver.
- Select Search automatically for drivers and follow the prompts.
If Windows says the best drivers are already installed but the issue continues, move on to reinstalling.
Step 2: Reinstall the Audio Driver
- In the same Device Manager window, right-click your audio device again.
- Choose Uninstall device and confirm.
- Restart your PC. Windows will attempt to reinstall the driver automatically.
Optional Step: Use the Manufacturer’s Website
- Visit your laptop or motherboard brand’s support page.
- Download the latest driver specific to your device model.
- Install it manually and restart.
Driver issues can appear after Windows updates, new hardware, or app conflicts. This is often the most effective fix if your sound stopped working recently.
After updating or reinstalling, don’t forget to recheck your output settings to make sure the correct device is selected.
Check for Windows Updates
Sometimes, a Windows update contains the exact patch your system needs to fix audio issues. Updates often include new drivers, security patches, and performance fixes.
Here’s how to check:
- Go to Settings > Update & Security > Windows Update.
- Click Check for updates.
- If updates are available, install them.
- Restart your computer to apply any changes.
Also check:
- View optional updates (found below the main update panel). These may include audio or driver-specific updates that are not installed automatically.
Microsoft regularly releases fixes for sound-related bugs, especially after major updates. Keeping your system current ensures you’re not battling old errors with outdated tools. After updating, test your audio again to see if the problem is resolved.
Disable Audio Enhancements
Audio enhancements are built-in effects in Windows that attempt to improve sound quality. However, in some cases, they can conflict with your drivers or hardware, causing your audio to stop working entirely.
Disabling them is simple and reversible, so it’s worth trying:
- Right-click the sound icon in the taskbar and select Sounds.
- Go to the Playback tab, then right-click your active audio device and choose Properties.
- Click on the Enhancements tab (or Advanced tab on some systems).
- Check the box that says Disable all enhancements.
- Click Apply, then OK.
Now test your sound again. If it returns, one or more enhancements will likely be the issue. If you’re using third-party audio software, check for similar settings there too.
This step is especially useful for laptops or prebuilt desktops with preconfigured audio profiles that may not play well with certain apps or updates.
Set Default Format and Sample Rate
Incompatible sample rates between Windows and your audio hardware can result in no sound or strange glitches. Resetting the format can often solve the issue.
Here’s how to change it:
- Right-click the sound icon and choose Sounds.
- In the Playback tab, select your active device and click Properties.
- Go to the Advanced tab.
- Under Default Format, choose either 16-bit, 44100 Hz (CD Quality) or 16-bit, 48000 Hz (DVD Quality). Test it if you want.
- Click Apply, then OK.
If you’re unsure which one to pick, start with 44100 Hz. It’s compatible with most music and media applications. Higher sample rates aren’t always better. They can cause distortion or silence if unsupported by your system.
Check App-Specific Sound Settings
Sometimes the issue isn’t system-wide. It’s coming from one app. Many programs, like Zoom or games, use their own sound configurations that can override Windows settings.
Windows 10 also lets you manage volume for each app individually. If one app is muted, your audio may seem broken when it’s just that program.
To check per-app sound levels:
- Right-click the sound icon in the taskbar.
- Select Open Volume Mixer.
- Review the sliders under each app. Make sure nothing is muted or too low.
For more detailed control, you can also go to Settings > System > Sound > App volume and device preferences.
This step is often overlooked but can quickly solve audio issues tied to specific apps without needing deeper system changes.
Check for Malware or Background Conflicts
Sometimes, malware or rogue background processes can interfere with your audio system. These issues may block audio services, overload CPU usage, or conflict with drivers.
Run a full system scan using Windows Defender or a trusted antivirus tool. Also, open Task Manager to review background processes and end anything suspicious.
If you recently installed new software and audio issues followed, try uninstalling or disabling it temporarily. Some apps, especially system cleaners or audio-related utilities, may unintentionally change settings or block devices.
Regular scans and avoiding unknown apps are simple habits that help you prevent these sneaky conflicts in the future.
Use System Restore or Reset (Optional Last Resort)
If none of the earlier steps have worked, and your sound was working fine just days ago, it might be worth using System Restore. It will allow you to roll your system back to an earlier point when everything worked.
- To begin, search Create a restore point in the Start menu and open it. Click System Restore, choose a restore point from before the issue started, and follow the on-screen instructions.
- If System Restore is disabled or unavailable, you can try Reset this PC. Go to Settings > Update & Security > Recovery, then choose Reset this PC.
- Select Keep my files to preserve personal data while resetting Windows. It will remove apps and revert system settings, which often resolves deep-rooted audio issues.
Only take this route if you’ve tried everything else. It’s effective (but more invasive), so make sure your files are backed up beforehand just in case.
When to Seek Professional Help
If your audio still doesn’t work after trying all the above solutions, it may be time to get help from a technician. The issue could be hardware-related, such as a failing sound card, a damaged motherboard, or a faulty port.
Visit a certified repair center or your device manufacturer’s support for diagnostics. If your device is under warranty, avoid attempting any hardware repairs yourself.
Professional help is also useful if you’re uncomfortable resetting Windows or dealing with system-level changes. Sometimes, spending a little to get expert assistance saves hours of frustration and may even catch unrelated issues early.
Conclusion
Sound problems on Windows 10 can be annoying, but they’re often fixable with a few careful steps. From checking simple settings and updating drivers to digging deeper into enhancements or malware conflicts, each fix builds toward a working solution.
You don’t need to be tech-savvy to handle most of these steps; you just need to be patient and methodical. Start small, escalate if needed, and don’t skip the basics.
If all else fails, using system restore or contacting a professional ensures you’re not stuck in silence forever. Hopefully, this guide helped you get your audio back without too much hassle.
