
Water and electronics have never been friends, and earphones are no exception. Whether it’s rain, sweat during a workout, or an accidental drop into the sink, moisture can quickly find its way into your earbuds. If not handled properly, it may lead to muffled audio, distorted sound, or even permanent damage.
The good news is that not every splash spells disaster. With the right approach and a bit of patience, you can often dry out your earphones and restore their performance.
In this guide, you will find effective, safe methods for getting water out of your earphones (whether wired or wireless) while avoiding common mistakes that can make things worse.
Let’s start with how to spot the early signs of water intrusion.
Signs That Water Is Inside Your Earphones
The most common sign of water in your earphones is distorted or muffled sound, especially on one side. You might also notice the volume is suddenly lower or cuts in and out during playback.
In wireless earbuds, connectivity issues or rapid battery drain can also point to moisture affecting internal components. For wired models, a static or crackling noise may be heard.
Sometimes, a faint “gargling” sound or vibration during audio playback also suggests trapped water near the driver. If you’ve recently exposed them to water and notice any of these signs, it’s time to act fast.
Immediate Do’s and Don’ts After Exposure
Do this first: If your earphones get wet, power them off immediately if they’re wireless. Unplug them from any device if they’re wired. Gently shake them to let excess water drip out, but don’t go wild with it. Pat them dry with a soft, lint-free towel.
Don’t: Never use a hairdryer, microwave, or direct heat source. It could damage internal components or melt plastic parts. Also, resist the urge to plug them in right away to “check” if they work. It can short-circuit sensitive areas.
Important tip: Don’t blow air into the earphones forcefully. You’ll likely push the moisture further inside instead of getting it out. If you suspect serious water exposure, let them rest and dry before doing anything else.
The faster you follow these steps, the better the chances of a full recovery.
Gravity and Towel Method
This is the simplest and safest method to begin drying your earphones. After gently wiping them with a towel, position them so that the speaker holes are facing downward. Place them on a soft, absorbent towel in a dry room.
The idea here is to let gravity do the work, pulling water down and out. Let them sit undisturbed for several hours, or ideally overnight. You can even slightly tilt one side of the towel for a bit of angle.
This method is especially useful if the water exposure was light, such as sweat or a light sprinkle.
Use Water Ejection Sound Tools
If you’ve ever heard about water being pushed out of a speaker using sound, it’s not a gimmick; it actually works. Certain frequencies, particularly low-frequency vibrations, can help force water droplets out of the earphone speaker mesh.
There are several websites and mobile apps designed specifically for this purpose. They play audio tones, typically between 100Hz and 300Hz, that vibrate the diaphragm enough to expel water. Examples include FixMySpeakers.com or apps like Sonic and Speaker Cleaner.
To use them safely:
- Connect your wireless earbuds or place wired ones near the sound source.
- Run the water ejection tone for about 30 seconds to a minute.
- Wipe any visible moisture that comes out.
- Repeat as needed, but don’t overdo it.
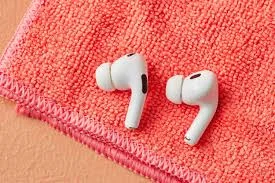
This method is especially helpful for AirPods or earbuds with sealed designs, where water can be trapped deep inside.
Just make sure your device isn’t actively charging during the process, and don’t use this technique as your only drying method. It’s most effective when combined with towel drying and air exposure.
Using Desiccants (Not Rice!)
Instead of tossing your earbuds into a bowl of rice (which can leave behind dust and starch particles), use silica gel packets or moisture-absorbing pouches. These are safer and more effective at drawing out internal moisture.
Place your earphones in an airtight container with several silica gel packets. Leave them there for at least 24 to 48 hours. For the best results, make sure the speaker side is facing downward or sideways.
Desiccants are ideal when you suspect deep moisture that isn’t easily removed by sound or towels. Many electronics and shoe boxes include these little packets; keep them! They’re one of the most useful tools in any water-recovery kit.
Cleaning and Inspecting After Drying
Once your earphones have had time to dry fully, take a close look at them before use. Use a dry, soft brush or a microfiber cloth to clean around the speaker mesh and crevices.
Check for any visible watermarks, residue, or buildup. These can affect sound quality. Also, inspect the charging points (if wireless) and cable connectors (if wired) for corrosion or grime.
Before powering on or plugging back in, make sure they’re completely dry to the touch. Only then should you reconnect them and test the audio. If the sound is clear, you’ve likely dodged water damage successfully.
Testing the Sound After Drying
Once you’ve cleaned and dried your earphones, it’s time to test them. Connect them to your phone or audio device and play a familiar track (preferably one with vocals and bass).
Listen carefully for any distortion, muffling, or uneven sound between the two sides. Test them at low and medium volumes first. If the sound is clear and balanced, your drying process was successful.
If things still sound off, try a water ejection tool again or give it more drying time before concluding there’s permanent damage.
When to Seek Repair or Replacement
If your earphones continue to malfunction after drying and cleaning, it may be time to consult a repair service. Persistent crackling, complete silence in one ear, or charging issues in wireless buds are red flags.
Check if your product is still under warranty, as some brands offer water damage coverage or affordable replacements. In cases where repair is too costly, replacing the earphones may be the smarter choice.
Especially for premium earbuds, professional diagnosis can prevent further damage from DIY efforts gone wrong.
Preventing Future Water Damage
Avoiding water damage starts with mindful use. Keep your earphones away from pools, bathrooms, rain, and sweat-heavy workouts unless they’re specifically rated as water-resistant.
Invest in a small waterproof case if you carry them in your pocket or bag. For gym use, opt for sweatproof models designed for exercise.
Also, be cautious when cleaning; never submerge them or use wet cloths. A little preventative care goes a long way toward extending the lifespan of your earphones.
Conclusion
Water in your earphones isn’t always a death sentence. With the right mix of patience, sound-based tools, and careful drying, you can often save them from permanent damage.
Avoid the rice trap and focus on more effective techniques. And remember- prevention is much easier than rescue.
Explore our other guides if you’re dealing with water-damaged phones or speakers, and stay equipped with smart tech care knowledge for the future. You’ve got this!
