

The front speaker, also called the earpiece speaker, is that tiny grill at the top of your phone you press against your ear during calls. Over time, it can gather dust, face oil, lint, or moisture, leading to muffled audio or distorted voices during conversations.
While it’s easy to blame poor call quality on signal issues or software bugs, sometimes the fix is as simple as a proper clean.
This guide is designed for everyday users who want to restore the clarity of their phone’s speaker without damaging it. We’ll cover what the front speaker is, what not to do, and how to prevent buildup.
Then, we’ll walk you through several effective and safe cleaning methods that actually work.
What Is the Front Speaker?
The front speaker, or earpiece speaker, is the small opening located above your phone’s screen. It delivers sound directly into your ear during phone calls, separate from the main loudspeaker used for media.
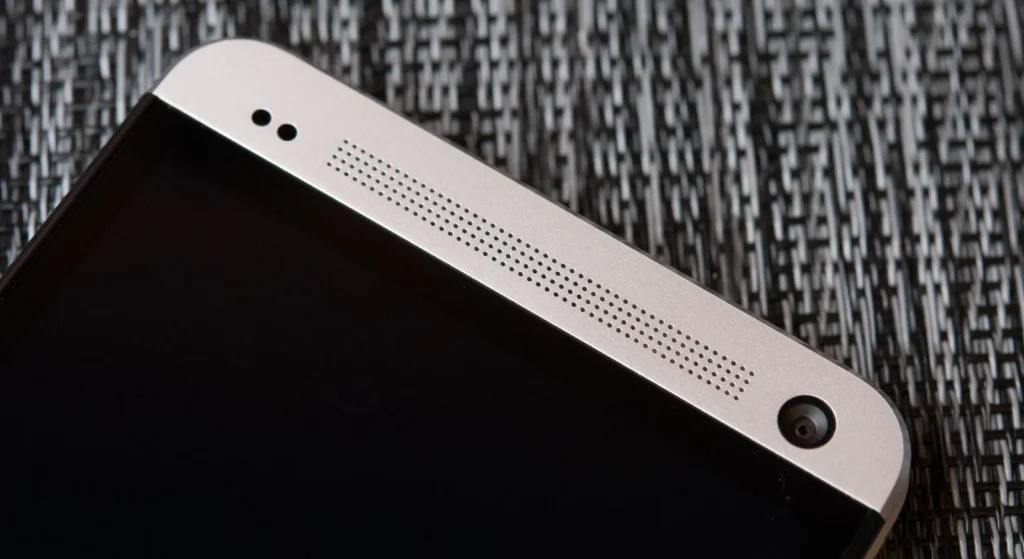
Because it sits right where your face touches the phone, it tends to pick up residue from skin oils, makeup, sweat, and dust. Unlike the bottom speakers, it’s often overlooked during routine cleaning. Even a thin layer of grime can seriously reduce audio clarity.
Knowing where it’s located and what affects it will help you clean it correctly and understand what kind of buildup you’re dealing with.
What to Avoid When Cleaning the Front Speaker
Some cleaning methods can do more harm than good. For starters, don’t use metal objects like pins or needles to poke into the grill. It can damage the mesh or speaker diaphragm.
Avoid compressed air cans, which can push dirt deeper or cause moisture condensation. Also, skip soaking the phone or using wet wipes directly over the grill, even if your device is water-resistant.
Harsh chemicals or alcohol poured directly onto the speaker can also corrode internal components. Gentle, surface-level techniques are always the safest route. When in doubt, less is more, especially when working near delicate components.
Effective Cleaning Methods
Below are practical techniques that regular users can safely try at home. Each method is simple, low-risk, and designed to clear dirt or debris without damaging your device. Choose the one that fits what you have available or combine methods for extra effectiveness.
Soft Brush and Gentle Brushing
Using a soft-bristled brush, such as a clean makeup brush or anti-static electronics brush, is one of the safest ways to clean the front speaker. Gently sweep across the grill in small strokes without applying pressure.
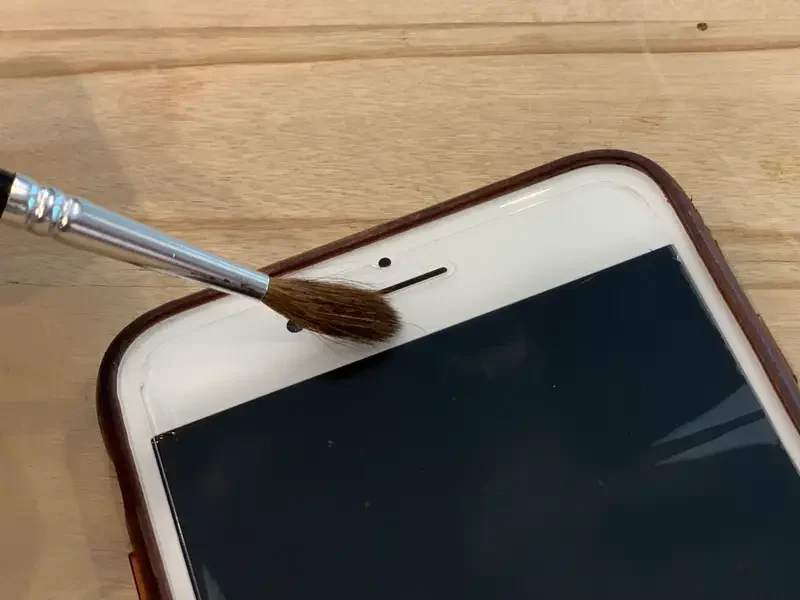
Brush in one direction, then switch angles to loosen hidden particles. Focus on light, repetitive motions; rubbing hard won’t help and may damage the mesh.
Avoid brushes with stiff bristles, as they can scratch the surface or push debris deeper. After brushing, tap the phone gently on your palm (speaker side down) to dislodge any loosened dust.
Painter’s Tape or Sticky Note Trick
This method is surprisingly effective for lifting lint or particles stuck on the surface of the speaker grill.
Fold painter’s tape (or the sticky end of a Post-it note) into a U-shape with the sticky side out, and dab gently over the speaker area. The adhesive picks up dirt without pushing it in.
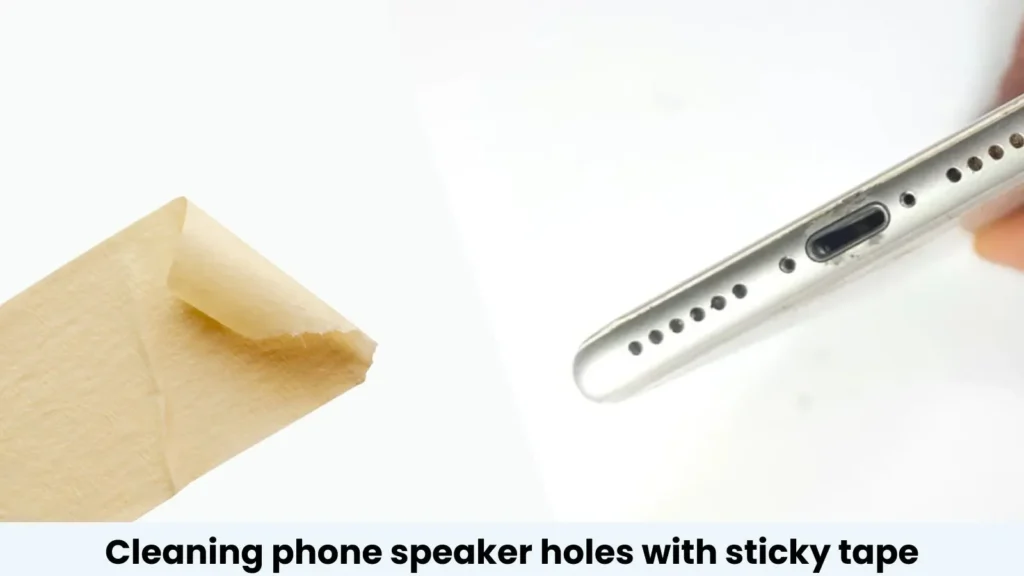
Don’t use strong tape like duct tape. It can leave residue or pull on the speaker mesh. Light contact and repeated dabs work better than pressing hard once.
Dust Blower or Bulb Syringe
If brushing didn’t help much, try a manual dust blower (like the ones used for camera lenses) or a small bulb syringe.
Hold the blower close but not directly against the speaker grill, then squeeze bursts of air toward the speaker. This can help dislodge dust without forcing it deeper.
Avoid using compressed air cans, which may release moisture or too much pressure. A manual blower gives you better control and reduces the risk to internal parts.
Speaker Cleaner Sound (High-Frequency Tone Method)
This technique uses high-frequency sound to vibrate water droplets or debris out of your speaker grill.
You can find “speaker cleaner” tones online or in dedicated apps. Simply play the sound at moderate volume for about 30–60 seconds with the front speaker facing downward. You might even see tiny particles or water get shaken loose.
This is particularly useful if you suspect minor moisture buildup. While it’s not a cure-all, it’s a safe first step before trying physical cleaning methods. Be sure to stop if you hear distortion or buzzing.
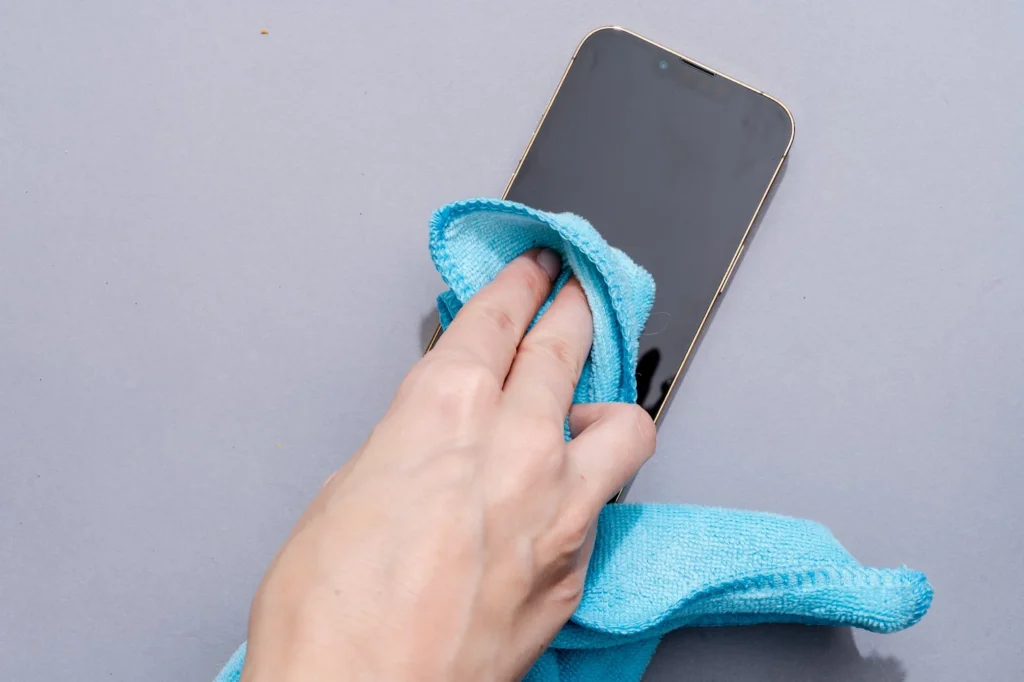
Microfiber Cloth with Isopropyl Alcohol (Minimal Use)
For slightly sticky grime or facial oil buildup, lightly dampen the corner of a microfiber cloth with 70–90% isopropyl alcohol.
Gently wipe across the front speaker grill without pushing the liquid into it. Use another dry corner of the cloth to follow up and absorb any residue.
Do not soak the cloth or pour alcohol directly onto the phone. This method works best for surface-level oils rather than deep-set dust. Only use it occasionally, as repeated exposure to alcohol can degrade certain materials over time.
Using a Toothbrush and Suction Combo (Advanced DIY)
For stubborn blockages, some users carefully brush the speaker area with a soft toothbrush while using a small USB vacuum or suction tool nearby.
This combo helps dislodge and immediately extract dust. However, it requires a steady hand and care, so it is not for those unsure about DIY repairs. Try this only if gentler methods fail.
Testing After Cleaning
Once you’ve cleaned the front speaker, it’s a good idea to test if your effort made a difference. The simplest way is to make a regular phone call or play a voice memo.
Listen for clarity, volume, and whether the sound still seems muffled or distorted. You can also switch between speaker and earpiece mode during a call to compare quality.
If sound improves, great; you’ve likely cleared the blockage. If not, repeat the cleaning process gently. Still no luck? The issue might be deeper, like internal moisture or hardware damage, and could need professional attention.
How to Prevent Future Buildup
Preventing front speaker buildup is all about small habits. First, avoid keeping your phone in dusty or lint-filled pockets. Clean your screen regularly with a microfiber cloth. This helps minimize oil transfer.
When on calls, try not to press the phone too tightly to your face. If you work out with your phone or use it in humid environments, consider a case with a cover or a speaker mesh protector.
Also, clean your front speaker once every couple of weeks, even if it doesn’t seem dirty. Regular light maintenance can help avoid major audio issues.
Conclusion
Cleaning your phone’s front speaker is simple, safe, and often highly effective when done correctly. Whether your calls have sounded muffled for weeks or you’re just into routine maintenance, it’s a smart habit.
By avoiding risky DIY shortcuts and knowing what signs to watch for, you can keep your earpiece working like new.
