

It’s frustrating when your HP laptop suddenly stops making sound. Whether you’re trying to watch a video, join a Zoom call, or listen to music, having no audio can disrupt your workflow or downtime.
While it might seem like a serious issue, the solution is often much simpler than expected.
In most cases, audio issues stem from incorrect settings, outdated drivers, or small software glitches. Luckily, you don’t need to be a tech expert to fix it.
This guide will walk you through a series of step-by-step solutions designed for everyday users, starting with the easiest checks and working toward more technical fixes.
Whether you’re using an HP Pavilion, Envy, or Spectre model running on Windows 10 or 11, these methods will help you troubleshoot and restore your sound.
Check the Basics First
Before diving into technical solutions, it’s important to rule out the simple stuff. A surprising number of audio issues come down to something minor.
Let’s begin by checking the most obvious (and often overlooked) settings first before moving on to deeper fixes.
Here are the basics to confirm:
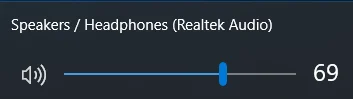
- Volume is Not Muted: Click the speaker icon in the taskbar and make sure the volume is turned up. Check your keyboard too. Some HP laptops have a mute key.
- Correct App Settings: If the issue only happens in one app (like YouTube or Zoom), check its internal volume settings.
- External Audio Devices: If headphones or speakers are connected, your system may be routing sound there instead of the built-in speakers.
- Function Key Toggles: Function keys like F3/F4 or F6/F7 control sound on some HP laptops. You might have accidentally muted or lowered the volume.
These basic checks can save you time and stress if it’s just a simple oversight. If everything looks good here, move on to the next step.
Inspect Audio Output Device Settings
If you’re not hearing anything, your laptop might be trying to play audio through the wrong output device, especially if you recently used headphones, Bluetooth speakers, or HDMI connections.
Start by checking your sound output settings:
- Right-click the sound icon in your taskbar and select Sound settings (Windows 11) or Open Sound settings (Windows 10).
- Under Output, you’ll see a drop-down list of available audio devices.
- Select the one labeled Speakers (Realtek Audio) or something similar. This is usually the built-in speaker output.
- Click Test to see if you hear the test sound.
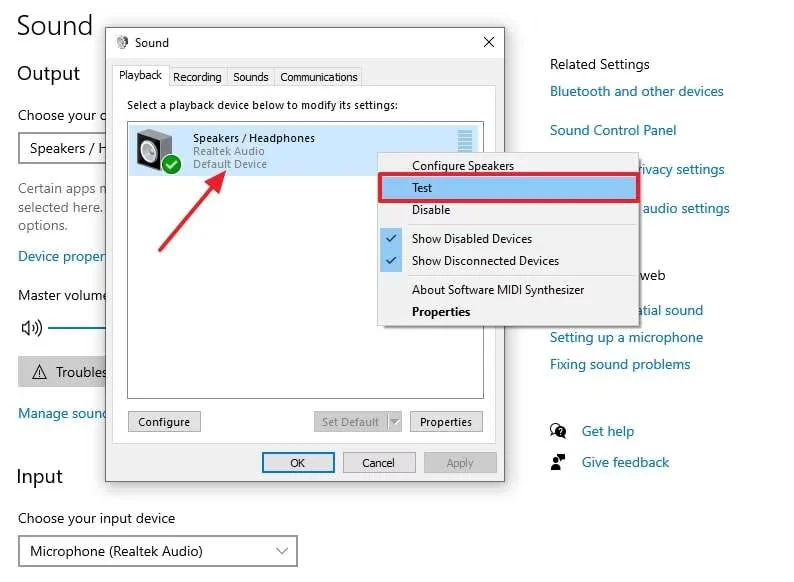
- Scroll down and click Volume mixer to ensure no individual app is muted.
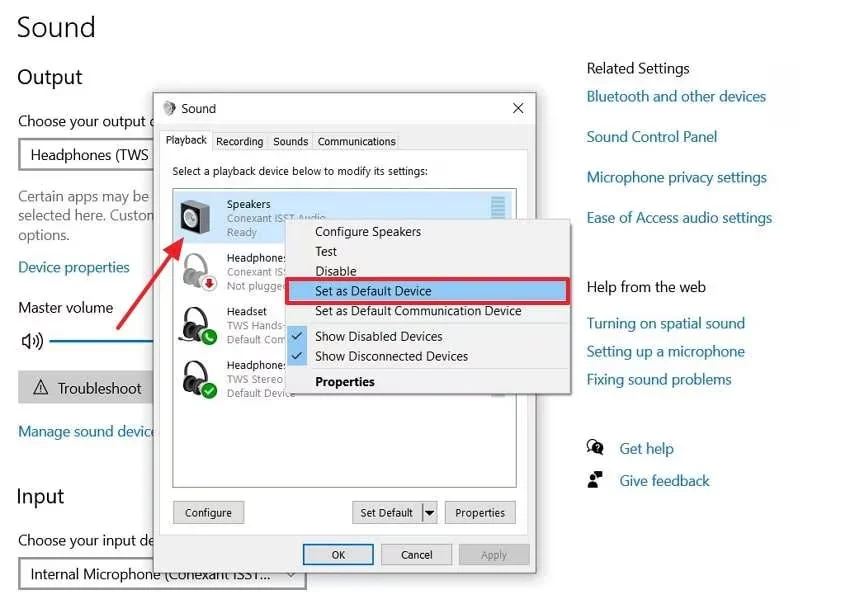
Also, consider temporarily disabling unused outputs. Right-click on the sound icon > Sounds > Playback tab. Right-click devices you don’t use and choose Disable, then Set Default on your laptop speakers.
If your laptop has multiple audio drivers or was recently connected to another device, it might default to the wrong output. Verifying and setting the correct device helps your system know where to send sound, especially after driver updates or sleep mode.
Run the Built-in Windows Audio Troubleshooter
If you’re unsure where to start, the Windows Audio Troubleshooter is a handy tool that automatically detects and attempts to fix common sound issues.
To launch it:
- Right-click the speaker icon on your taskbar.
- Select Troubleshoot sound problems.
- Windows will scan for issues, suggest fixes, and prompt you to apply them.
This tool checks things like muted devices, disabled audio services, or improperly set default output. Sometimes, it resolves the issue instantly without needing further action.
However, if the troubleshooter returns with “No problems found” or applies a fix but the sound still doesn’t work, it’s time to try manual solutions. This tool is great for quick diagnostics, but may not help with driver-level or advanced hardware conflicts.
Update or Reinstall Audio Drivers
Outdated or corrupted drivers are among the most common causes of sound issues on HP laptops. Updating or reinstalling them can restore proper functionality.
Here’s how to update your audio driver manually:
- Press Windows + X and select Device Manager.
- Expand Sound, video and game controllers.
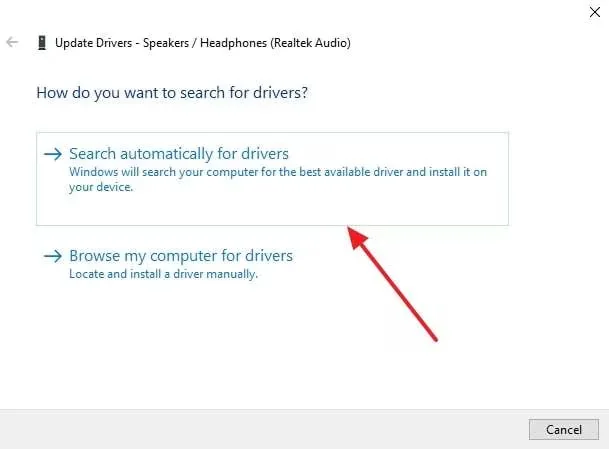
- Right-click on your audio device (usually Realtek High Definition Audio) and choose Update driver.
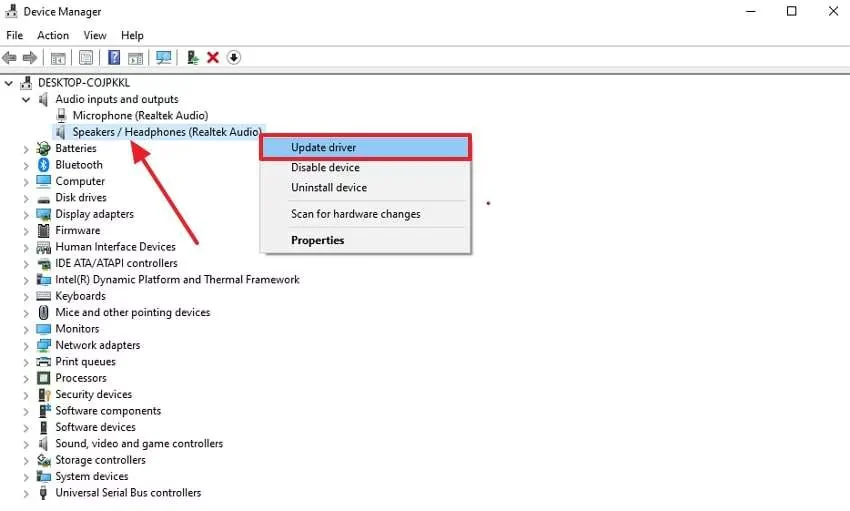
- Select Search automatically for drivers.
If no update is found or the issue persists, reinstall the driver:
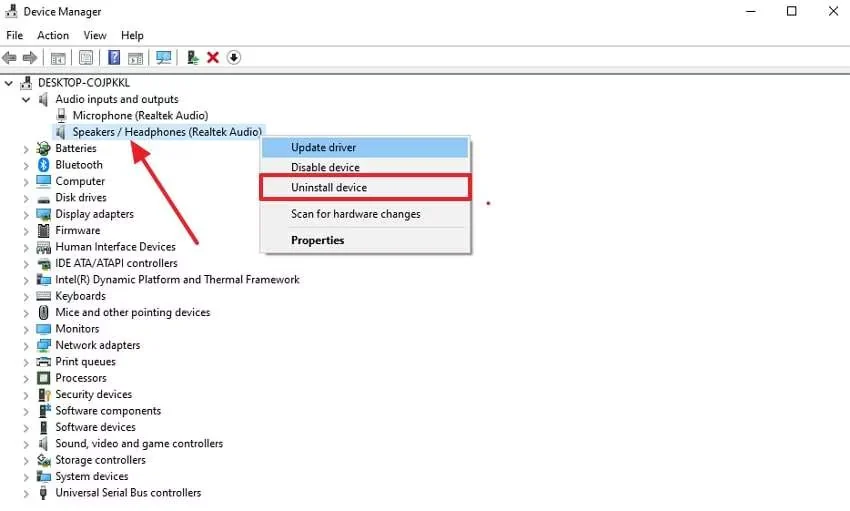
- In Device Manager, right-click the audio driver again.
- Select Uninstall device, then check Delete the driver software for this device if available.
- Restart your laptop. Windows will attempt to reinstall the driver automatically.
Alternatively, you can visit HP’s official website and download the latest audio driver for your model. Make sure it matches your Windows version.
Reinstalling is especially helpful if the current driver has become unstable or was damaged during a system update. This fix often solves sudden audio dropouts or distortion if you recently updated Windows or installed new software.
Roll Back Driver (if issue began after update)
Rolling back the audio driver can undo recent changes if your sound stopped working right after a driver or system update.
To do this:
- Open Device Manager and expand Sound, video and game controllers.
- Right-click your audio driver and select Properties.
- Go to the Driver tab and click Roll Back Driver, then follow the prompts.
This option is only available if an older driver version was previously installed. If the button is grayed out, try reinstalling the driver manually instead.
Rolling back is a quick way to revert unexpected issues caused by newer but incompatible driver updates.
Check Audio Enhancements and Advanced Settings
Sometimes, built-in audio enhancements meant to improve sound quality can end up causing glitches or distortion, especially after updates or driver changes.
To adjust these settings:
- Right-click the speaker icon in your taskbar and select Sounds.
- Go to the Playback tab, right-click your default speaker device, and click Properties.
- In the new window, switch to the Enhancements tab.
- Check the box for Disable all enhancements, then click Apply.
Turn off or Disable Audio Enhancements in Windows 11/10
If your laptop is running Windows 11 and this tab doesn’t appear, go to Settings > System > Sound > All sound devices > Properties for your output device. Look for any enhancement settings or spatial sound effects that may interfere.
Also, check the Advanced tab for sample rate and bit depth. Try setting it to 16-bit, 44100 Hz (CD Quality), which is a standard and compatible setting.
Some users experience sound dropouts or static due to advanced modes like exclusive mode or third-party enhancements. Disabling them temporarily can help isolate the issue.
Once disabled, test the audio again. If the sound returns, one of those enhancements was likely the culprit. You can always re-enable them later if needed.
Reset Windows Audio Services
If sound settings and drivers seem fine but there’s still no audio, the problem might lie with Windows’ audio services not running properly. Restarting these services can refresh the system and resolve hidden errors.
Here’s how to do it:
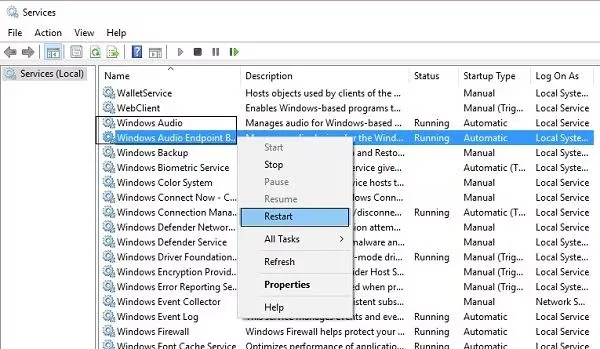
- Press Windows + R, type services.msc, and press Enter.
- In the Services window, scroll down to find Windows Audio.
- Right-click and select Restart.
- Do the same for Windows Audio Endpoint Builder and RPC Endpoint Mapper if visible.
If any of these services are not running, right-click and select Start.
Sometimes, updates or background crashes stop these services without showing a warning. Restarting them manually ensures that your system is actually processing sound output commands.
After restarting, test your audio again. If it works now, consider setting these services to start automatically to prevent similar issues in the future.
BIOS and System Updates (HP Support Assistant)
Outdated system firmware or missing hardware updates can also cause audio issues, especially on HP laptops that rely on tightly integrated drivers. This is where the HP Support Assistant comes in handy.
HP Support Assistant is a pre-installed tool that checks for BIOS, chipset, and driver updates specific to your model. If you’ve uninstalled it, you can download it again from HP’s official website.
To use it:
- Open HP Support Assistant and check for updates.
- Install any audio, BIOS, or system-related updates it suggests.
- Restart your laptop after installation.
Updating the BIOS may seem advanced, but HP makes it user-friendly. A firmware or system-level update can fix compatibility issues, especially after major Windows upgrades.
Make sure your laptop is plugged in during updates to avoid interruptions. Regular use of HP Support Assistant also helps you stay on top of future issues before they cause problems.
Factory Reset or OS Repair (Last Resort)
If you’ve tried every method and your HP laptop still has no sound, a factory reset or OS repair might be your last resort.
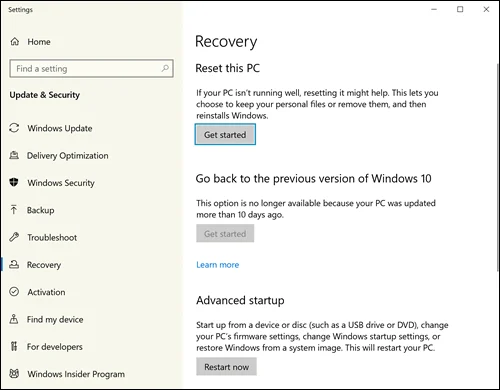
First, consider performing a system restore to a point when the sound was working. If that fails, go to Settings > System > Recovery and choose Reset this PC. You can keep your files while reinstalling Windows, which often resolves deep-rooted software issues.
For more advanced cases, use the Windows Media Creation Tool to perform an in-place upgrade or clean install. Make sure to back up your data beforehand.
Only take this step if all other solutions fail or your system is severely corrupted. It can fix complex audio bugs tied to system damage or conflicting software.
Preventive Tips to Avoid Future Sound Issues
Once your sound is working again, a few simple habits can help keep it that way.
- Keep Drivers Updated: Use HP Support Assistant or Windows Update to check for driver and BIOS updates regularly.
- Avoid Forced Shutdowns: Improper shutdowns can corrupt system files, including those related to audio.
- Use Surge Protection: Sudden power surges may damage internal audio components.
- Install Trusted Software Only: Avoid third-party audio boosters or tweaks that can conflict with default sound settings.
- Clean Your Laptop Occasionally: Dust around speakers and ports can cause muffled or distorted sound over time.
Conclusion
Sound problems on HP laptops can be frustrating, but in most cases, the fix is simpler than it seems. Whether it’s a quick run of the troubleshooter, updating your drivers, or tweaking a few settings, following a structured approach helps you pinpoint and resolve the issue efficiently.
Don’t jump straight to factory resets. Try basic solutions first. And once you get your sound back, keep your system updated and clean to avoid recurring issues.
With this guide, you’re better equipped to troubleshoot future problems without stress or guesswork. After all, clear sound is very essential for daily work, meetings, and entertainment.
